Lynnette Parker
Independent Stampin' Up! Demonstrator
tpshelf21@gmail.com

Monday, December 31, 2012

Happy New Year everyone! So sorry it has been so long since my last post. I am really going to have to rethink this whole blog thing after the first of the year. I am just not very good at fitting it in my schedule. I believe that I will change things up a bit and just post some pics (with not much explanations) and if anyone has a question about how things were done they can leave a comment. The posting instructions and item numbers just takes sooooo much time. Time I just don't seem to have. If I can get the pictures taken and adjusted for posting that is about all I got! Anyhoo......Thought I would share with everyone my Hostess Appreciation project for this year. It is a printers tray (I have also seen painters tray?). So much fun!! We used many different pieces of DSP and lots of embossing and embellishments. I believe the ladies were quite happy with their finished products.

 The bells, Merry Christmas sentiment, and wreath were all embossed. The wreath also has some Dazzling Details in cherry for the berries.
 We added some Dazzling Details to Santa and the center of the Poinsettias. Also a little Crystal Effects to Santa's glasses. Thanks ladies for the great ideas. My Santa was a little plain when we started. Deck the Halls is also embossed.
 Don't ya just love the Christmas tree?????? OMG one of my favorite parts. Little oragami folds, much easier than it looks. Added a little Crystal Effects on the berries for the holly and some scoring to make the leaves look real.
 Sorry this pic is a little blurry. The family is embossed and we added a little Dazzling Details on the pinecones to make them shimmer.
 Ok, this is my favorite part. Paper ribbon. Love, love, love!!!
The reindeer and the Merry and Bright are both embossed.
Hope you enjoyed the project today. New rules! If you have any questions about this project please send me an email or post a comment and I will get right back to you. I hope everyone has a great New Year!

Friday, December 14, 2012


Hello everyone. So sorry that I haven't posted in so long. These holidays and multiple workshops in one month has got me all flumuxed! (Is that a word??? Maybe in Lynnettespeak). Anyhoo, unbelievable amount of great stuff on the Clearance rack right now and everything is while supplies last (and trust me they aren't kidding!). Make sure to check back next week, I plan to post daily until Christmas! Pinky sware ;)-  Happy Shopping!!

Thursday, November 29, 2012

Hello everyone! Boy has time flown by. Can't even believe that it is almost December. Will be posting some awesome gift tags soon. Can't spoil the surprise for the ladies who are coming on Saturday right?? Anyhoo, until then here is the latest promotion from Stampin' Up. I know the image is a little small to see but you know me, not the most tech savvy of the group! Best I could do. For more info just click on the shop now link and then the "learn more" link on Holiday Bundles. These are PERFECT  for those teacher/co-worker gifts! No stamping (or even taping) required! Believe I will have to snatch some of these up myself. Hope everyone had a great Thanksgiving, I know I am still recovering. Have a great day!

Friday, November 16, 2012

Ok ladies, are you ready for some holiday shopping???? All those massive retailers aren't the only ones offering great deals for next week. Stampin Up is getting in on the craze too. From November 19th thru the 28th Stampin Up is offering great savings on tons of products. Visit StampinUp.com or click on the "Shop Now" link on the right sidebar to check it out. Happy Shopping all!

Sunday, November 4, 2012

Thanksgiving wine bottle tag

Happy November everyone! Whew has this year just flown by huh? I have to say I just LOVE fall and fall crafting. I also just love, love, love today's project! Gojous! I have a Christmas card workshop on Saturday and wanted to make something for the freebie basket. This is a wine bottle tag. (Sorry no pic of the actual "tag" part). I took my inspiration from a pinterest pin from http://www.stampingwithloll.com/. For her card she used some fancy smanshy crackle paint technique but it looked just like the retired Cheesecloth background stamp to me, so that is what I used. I started with vanilla cs and cut out the leaves using the new Autumn Accents Bigz die (127812). I then sponged More Mustard, Pumpkin Pie, Cajun Craze, and Early Espresso. I worked my out to the edges with each color ending with the Espresso only on the outer edges. Then I stamped in Espresso three different background stamps (all retired :( Cheesecloth, Sanded, & Weathered). Next I stamped in Espresso a different element for each leaf from Autumn Days set (retired). The sentiment is from the With Gratitude set (also retired) and was sponged to match the leaves and stamped in Espresso.

The tag itself in Crumb Cake cs measures 8 1/2" x 3 1/2" and is scored at 3 1/2". I then used the 1 3/4" circle punch to make the opening for the wine bottle neck. The background Espresso piece was 3 1/2" x 5" from the start and then I ripped all around the edges and ran thru the Big Shot with the Woodgrain emboss folder (127821). All Crumb Cake edges were sponged with Espresso. To finish it off I added a Brushed Bronze button (127833) and some twine.

Hope you enjoyed the project today. I sure enjoyed making it! Have a great day.

Friday, October 26, 2012

October 29th - Sell a Stamp Spooktacular!


SAVE THE DATE 10/29!!!! What an ubelievable deal! For one day only, you will get 15 percent off almost every stamp we sell! The goal is to sell more stamps in a single day than ever before!
Here are the details: (Updated 2:35 PM (MT) 10/25/2012)
  • On October 29th starting at 12:00 AM (MT) and ending at 11:50 PM (MT), almost every stamp we sell will be 15 percent off.
This means all stamps in the current catalogs including
    • Background stamps
    • Personalized name stamps
    • Incentive stamp sets from the supply list
    • Cookie press stamps
    • Single-image stamps
This DOES NOT include
    • Hostess sets
    • Bundled stamp sets
    • Digital stamp brush sets
  • There is no minimum purchase, and no limit to the number of stamps you can order.

  • The online store will have all the correct pricing so all you have to do is get out your wish list and click on the "SHOP NOW" link on the right side bar and start saving! Happy Halloween everyone.

    Wednesday, October 24, 2012

    "BOO" Halloween Fun

     Hello friends. Long time no post. Whew, this blog thing is much more work than I anticipated. How do these ladies do it??? Posting daily, kudos to all of you out there who manage it! Anyhoo, just wanted to share what me and my gals did a couple of weeks ago. We made this super cute "BOO" sign for some Halloween fun. We also made a Halloween card that I will be posting tomorrow. (I know what you are thinking...you will believe it when you see it right?) I used the Top Note die (#113463) to cut out chipboard and then the DSP. The letters are from the retired Serif Essentials die set.
    Aren't the bats cute??? Some of the ladies used black cardstock instead of the Champagne glitter and that was super cute as well. I used small contraband rhinestones and colored them with a black sharpie marker for the eyes. The button in the corner is one of our new Brushed Bronze (#127833) buttons tied with some retired old olive and pumpkin pie ribbon. Great way to get rid of some of that retired ribbon ladies!
    On this piece, I used the Core'dinations DSP (#127848 in espresso) with the spiderweb emboss folder (#120889) and then scruffed away! The pumpkin is made by using the large oval punch (#119855) x 3 pieces and then I ran it thru the woodgrain emboss folder (#127821) for texture. The leaf and stem were made using the blossom petals builder punch (#121808).
    For the final piece, I used some store bought spiderweb and spider and some more retired pumpkin ribbon. I also sponged pumpkin pie on this piece of DSP to make it look a littler spookier. All three pieces were strung together with more retired ribbon (5/8" espresso grosgrain) and some oober tape (sticky strip for everyone out there that isn't familiar with Lynnette speak ;) Hope you enjoyed the project today. Get out some of your retired ribbons and your Big Shot and have some of your own Halloween fun!! have a great day!

    Tuesday, October 2, 2012

    October promotion

    Hello all! Happy October to you. Not that our weather is cooperating with fall, but...... Just wanted to quickly share this months promotion with you. Stampin Up has added some new bundles to go with the Ornament Keepsakes set. You can choose from the set, die, and Candlelight DSP or just the set and DSP and receive the matching paper piercing pack for free! Love, love, love those pierce packs! For more details just click on the "Shop Now" link on the sidebar and then the "Our Christmas Gift to You" link for all the scoop. Hope you have a great day.

    Tuesday, September 25, 2012

    September Swap

     Good morning everyone! Hope you all had a great weekend. Today's project is my card for my September swap group (http://openswappers.blogspot.com/). Great group of ladies and projects. This month I used the Hello, Doily background stamp. I have seen so many great samples with this stamp and it was my first time working with it. Love how lacy it is don't you? I stamped the image with versamark and then clear embossed it. I then masked it and stamped En Francais with Crumb Cake. The sponging was then done with Marina Mist and Crumb Cake. If you have never tried this technique, it is so much fun and gives you a great effect. You can clear emboss any image, sponge any color over it, then wipe off with a paper towel and your clear embossed image just pops. I also sponged all vanilla pieces with Crumb Cake, they were just too bright otherwise. I added some texture with the Fancy Fan emboss folder and some bling with a pearl, button, and ribbon (I know I can't believe this ribbon is retired either :(  The tag was made with the Modern Label punch, but I shortened it and added the button to the end.
    Don't forget to joosh (is that a word? I sure use it alot) up your inside of your card too. I used the same emboss folder and ribbon as I did on the front of the card. Hope you enjoyed the project today. Have a great week all!

    Friday, September 21, 2012

    Pointsettia

    Hello all! Over a week since my last post? What? Where does the time go?? Crazy, how did I ever have time to work??? Hope your week went well. Today's post is another Christmas card for next weeks workshop. I used the new Watercolor Winter and Greetings of the Season sets in the Holiday catalog. I did mention that this Holiday catalog is unbelievable right?? The DSP comes from three different packs - Letters to Santa (retired), Snow Festival (Holiday catalog), and Festival of Prints (Holiday catalog). The card base is Crumb Cake as well as the ink on the "Noel" piece that comes from the Everything Eleanor stamp set. The "Noel" was stamped in Old Olive. Don't you just love how the Cherry Cobbler and Primrose Petals colors compliment each other on the flowers? Love that combo! Just a hint on these two step stamps, even though they are clear stamps I find it so much easier if I use my stamp a ma jig and make a template. Otherwise it just never looks right. So drag out that dusty old tool! It still comes in handy.

    Don't forget to dress up the inside too! Just a piece of DSP with an edgelit and a couple pieces of cardstock and vuala! Hope you enjoyed the project today. Have a great weekend!

    Thursday, September 13, 2012

    Christmas Ornaments

     Good morning everyone! Today's project is Christmas card for my next workshop. Love the way this one turned out. It has that shabby chic thing going on. I used the Ornament Keepsakes set and dies with Island Indigo ink. The background piece uses the direct brayer to emboss folder technique with Crumb Cake ink. Great technique for that vintage look. All you do is ink up your brayer well and cover the debossed side of the emboss folder with ink, then insert your cardstock and run thru your Big Shot. Vuala! Easy technique for very dramatic effect. The two emboss folders I used were the stripes for the ornament background piece and the lacy brocade on the larger background piece. The sentiment comes from the must have More Merry Messages set. All vanilla pieces were mucked up with a sponge and Crumb Cake. Just love the ruffled ribbon and the pearls, very elegant.
    Don't forget to decorate the inside of your card! I used Crumb Cake on the sentiment (also from More Merry Messages) and Island Indigo for the ornament. The border was made with the scallop trim border punch and the string was from an old ornament set I had in my stash, but could easily be made by hand with a Crumb Cake marker. Hope you enjoyed the project today. It's almost the weekend!!! Have a great day.

    Wednesday, September 5, 2012

    Blooming with Kindness

    Good Hump day morning everyone! Up early with my son to get him off to school after being sick yesterday. The air is cool and the geese are quite active, can't wait until fall has arrived for good (not just in the am!). I thought I would take a step away from posting Christmas cards today. This is a case from ????, sorry I searched and searched and can't remember what blog I found this inspiration on. I search so many blogs that sometimes the exact blog that gave me my inspiration escapes me. Thanks to whoever you are! Anyhoo, I used the Blooming with Kindness set (Item #126422) for this card. Isn't this set just fabulous??? Love the flower and all the words. A little hint on the flower stamp, I removed the stem to make it easier to use. I still have the stem with the set but when just using the flower image (which will be most of the time), I don't have to fight with trying to either mask or use markers to color it separately.

    The colors I used were Baja Breeze, Marina Mist (the new reformulated pad/ink - what a difference the new ink formula makes!), Midnight Muse, and Wild Wasabi. I first stamped the flowers and sponged a little into the centers to mute some of the "white" that was glaring at me. Then masked the flowers and used large post it notes to cover around the edges to make a "frame" of white around the edges. Then I sponged with the Wild Wasabi. After removing the masking, I used my Color Spritzer tool (Item #107066) with the Midnight Muse marker to get the speckled look (was a little heavy handed on the spritz, would have a liked it to be a little less). I did try the new spritzers that Stampin Up has now but because you have to mix the ink with a liquid, it wasn't the dark spritz that I was looking for. The sentiment is stamped in Midnight Muse as well.


    In the center of the flowers I put a pretty heavy blob of dazzling details and then put the pearl on top. Love the little extra it added to the card. Gotta have a little bling right?

    For the inside of the card I just stamped the flowers and then a bit more spritz. Hope you enjoyed the project today. Have a great day!

    Monday, September 3, 2012

    Ice Skates

     Hello friends! Hope today finds you well. Today's project is another Christmas card. I just love the way this card turned out so elegant. It just looked like my hostess to me. I was right she loved it! I used the set Winter Memories (Item #127937) from the Holiday catalog. Can you believe the Holiday catalog this year???? Something on EVERY page you just have to have right? Yeah I know me too! The image was stamped in Versa Mark and embossed with gold emboss powder. Then I watercolored the leaves with Old Olive and the skates with River Rock. The berries and "ribbon" (actually the shoelaces but who's counting?) with Cherry Cobbler marker. Tip for the marker part, make sure to blot it dry or you will transfer ink all over the place because it doesn't dry when it is on the embossed section. Not that it happened to me or anything???? (see cherry smudge on image wink, wink).

    For the background pieces I used the Petals a Plenty emboss folder, Versamark and clear emboss with snowflakes on smaller vanilla piece (hard to tell in a pic), and the new Champagne Glimmer paper (Item #127885). The Merry Christmas sentiment is from the Open Sleigh set (Item #126462) and stamped with Cherry Cobbler. Just like how it's font seemed old fashioned.

    Don't forget to dress up the inside of your card! The sentiment is from set More Merry Messages (Item #126402) and stamped in Cherry Cobbler. Then I added more texture and a strip of the Champagne Glimmer paper.
    Hope you enjoyed the project today. Have a great day!

    Snowmen on Canvas

     Happy Labor Day to all! Hope you all got to have the day off. Today's project is the first of many Christmas cards to be posted. In the mood for Christmas yet???? Hopefully these cute snowmen get you there. I used a piece of canvas that I bought a the fabric store. I bought a yard for around $10 and I think I will have enough canvas for the rest of my days!! Even after prepping about 70 kits. Good bang for your buck! The Frosty Friends (Item #128117) were stamped in Staz On brown ink (make sure to ink the pad well and press fairly hard on stamp to get a good impression) and colored in with markers. Not sure if you can tell but the heart on the one snowmans chest was filled in with the Cherry Cobbler dazzling details (Item #125585). Aren't they stinkin cute!! After stamping and coloring them I frayed the edges and "mucked" it up with some crumb cake ink and sponges/blender pen.

    For the rest of the card I used the new Core'dinations card stock in Gumball Green (Item #127847) and the new sanding system (Item #129367). What fun that was. You first run the piece of cardstock thru the Big Shot using a emboss folder and then sand away. Messy but worth the end results. I also used Naturals Ivory (Item #101849), Gumball Green, and a couple of different patterns of Be of Good Cheer DSP (Item #126896). Add some Cherry Cobbler Tulle (Item #127841), ribbons, button, tag and your all dressed up!

    Make sure you don't forget to dress up the inside of your card too! I used More Merry Messages (Item #126402) for the sentiment (a must for your collection!) and the tree from the set Stylin' Snowfolk (Item #126287).
    Hope you enjoyed the project today and hope it got you in the mood for some Good Cheer! If you have any questions about today's project or about Stampin' Up products please leave a comment or shoot me an email. Would love to hear from you! Have a great day!

    Saturday, September 1, 2012

    It's Back to Spool Time!

    Hello everyone! Sorry for my absence, summer time is just crazy yes? With football season and school starting, things have just been super busy around my house. It has been so nice and cool in the mornings and I hear those geese flying in everyday, this means fall is almost upon us and things will finally start to slow down! Whew, hoping to get back into the blogging groove again soon! For now I wanted to share the latest Stampin Up promotion, with every $40 purchase in September, you will receive a free spool of the 3/8" stitched satin ribbon (that's an $8.95 value not including s/h or tax!). Love, love, love this ribbon! Very soft and elegant and makes great bows. Hope everyone has a great Labor Day weekend! Check back soon!

    Wednesday, August 1, 2012

    Spooktactular promotion and Holiday Catalog

    Well ladies the new Holiday catalog has arrived! I can honestly say I couldn't believe all the great stuff that I just HAD to have out of this one! I have add the catalog to the side bar in case you didn't receive yours yet. It is simply unbelievable right??? Also, during the month of August Stampin Up is having a Spooktacular promotion for all new recruits.


    When you sign up for $99, you get to choose ANYTHING worth $125 and get this awesome printers tray kit (worth $60) absolutely free! Plus get all the great benefits of being part of the Stampin Up family. If you are interested or have any questions contact me today. Have a great hump day everyone! More project pics to come tomorrow.

    Wednesday, July 25, 2012

    Reason to Smile and We Heart Our Hostess promotions

    Reason To Smile
    Thought I would post the latest promotion for Stampin Up. I know I am posting this almost at the end but thought you might like to check it out anyway. The other awesome promotion during July is the We Heart Our Hostess. For any workshop of $450 or more, you earn an extra $50 worth of free stuff!! So at $450 sales, instead of earning $65 + 1 item at 50% off, you earn $115!! Wow huge right? And just remember ladies, you can have a workshop all by yourself if you want! If you are interested in getting in on this great deal before it goes away, just shoot me an email or click on the "Shop Now" icon on the sidebar. Have a great day all!


    Your Party Sales*
    Regular Hostess Benefits
    Additional Hostess Dollars
    Total Hostess Benefits
    $450
    $65 + 1 item at 50% off
    $50
    $115 + 1 item at 50% off
    $500
    $80 + 2 items at 50% off
    $50
    $130 + 2 items at 50% off
    $600
    $100 + 2 items at 50% off
    $50
    $150 + 2 items at 50% off
    $700
    $115 + 3 items at 50% off
    $50
    $165 + 3 items at 50% off
    $800
    $130 + 3 items at 50% off
    $50
    $180 + 3 items at 50% off
    $900
    $145 + 4 items at 50% off
    $50
    $195 + 4 items at 50% off
    $1,000+
    $160 + 4 items at 50% off
    $50
    $210 + 4 items at 50% off


    I'm Back......


    Well hello long lost friends! It has been way to long since I have posted. We got moved and settled but sure took longer than I thought it would. Wow, does anyone have more stuff than us?????? The folks who helped us move are saying a resounding "NO" right about now. I hope to be back to posting regularly. I am going to start with a card I made for a swap group I am in. You can check out all the pics for previous months here http://openswappers.blogspot.com/. This was my card for July. I used my new favorite stamp set Summer Silhouettes. I love how easy it is to use. No need for markers, the images are solid and the stems and flowers are separate so all you have to do is pick your colors and stamp away! I used two of our new In Colors, Summer Starfruit and Gumball green and then combined those with two of my old favorites Cherry Cobbler and Early Espresso. Don't you think this is going to make a great fall color combo??? I sure do. Can't wait until it's fall card making time! My favorite time of year!

      I hope you can see in the close up pic, I used some bling bling in the center of the flowers using the Dazzling Details. Remember the "old days" when we had to use glue and glitter??? What a pain that was yeah? So simple to add bling whenever and wherever you want now! Makes me smile ;) Also added some pearls at the bottom on the scalloped edge. The bottom strip was created using the Parlor Prints background stamp with Summer Starfruit and the new stitched satin ribbon in Gumball Green.


    The elegant embossed border was made using the Simply Scored tool. I scored at the first and fourth hash marks. Then I turned my card 45 degrees and repeated the same scored pattern until all four sides were scored. Love how easy this is to do but how big of an impact it makes. Hey, just a thought, maybe I need to send in a suggestion to Stampin Up - more emboss folder frames please!! And don't forget your inside of the card! I used the new Fancy Fan emboss folder and Cherry Cobbler quilted satin ribbon (retired! why oh why, was one of my favorite ribbons, boo hoo). Hope you enjoyed the project today. I will be posting again soon. Hope you have a great day!


    Sunday, June 3, 2012

    Extended Abscense

    Just wanted to check in before my internet is gone for a little while. I am in the process of moving (is there anything worse??? I think NOT!) and my internet will be away for about a week. My stamping stuff is also all boxed up (which I must tell you was a little more disheartening than I thought it would be ;). I vow to have everything in it's place and get my new "zen" place (translation: stamping space) up and functional in a couple of weeks. I did place a very large order with all new goodies to play with and will be posting some new fun stuff as soon as I can! So hang in there with me! I did add the new catalog to the sidebar for your perusing while I am away. Chat with you soon!

    Friday, May 18, 2012

    Retiring In Colors

    Stampin Up just posted this on the demonstrator website. I know it was a good thing they told me (since I was considering getting rid of them) so I thought it might be good info for you too. Happy Friday everyone!


    As you know, the 2010-2012 In Colors will retire at the end of the month. It's hard to believe that it's already time to say goodbye to Blushing Bride, Concord Crush, Peach Parfait, Pear Pizzazz, and Poppy Parade!
    We announced in 2010 during the last color renovation that we plan to refresh the Stampin' Up! color collections every three to five years. With that in mind, you may want to hold onto your 2010-2012 In Colors supplies in case we add them to a color collection in the future.

    Wednesday, May 16, 2012

    Mojo Monday 241

    Ok, I didn't think I was going to be able to get any stamping in but...... I sure needed the therapy today! What would we all do without stamping???? Not sure it is any cheaper than a therapist but sure is more fun!! Anyhoo, feeling much better now and love, love, love the card I made! I used the Mojo Monday #241 sketch and the color scheme/DSP in the May issue of Stampin Success that we demonstrators get. What do you think?


    I used Crumb Cake (my fav neutral), Soft Suede, Calypso Coral, Vanilla, and Mocha Morning DSP. I used Crumb Cake and Calypso Coral on the flower with the Rock n Roll technique. The sentiment was stamped with Soft Suede. Of course I had to add some ribbon, texture and pearls right? The sentiment came from Field of Flowers, the flower from Kind & Caring Thoughts, and the butterflies from Kindess Matters.


    Make sure you don't forget the inside! I used the same inks and Rock n Roll technique for the inside except I had to sponge a little of the Calypso Coral on the inner flowers since they won't "roll".
    I hope you liked it. Happy Hump day!


    Monday, May 14, 2012

    Lattice

    Happy Monday to all! Whew what a crazy week. Hope everyone had a great Mother's Day. Today's post is another one of the cards from my last workshop. It uses the lattice technique that Frenchie graciously made a video tutorial for us all to follow here: Stamp & Scrap with Frenchie Thanks Frenchie!!

     Isn't she a beauty? Looks much harder than it was too! (Right ladies?? You know who you are!) I used Melon Mambo cardstock and DSP, Old Olive, and Vanilla. For inks I used Melon Mambo classic and craft (and yes I am still pouting that all craft is retiring!)and Old Olive. The craft I used on the front so I could emboss the sentiment. For the bling I used the Blushing smooch spritz, dazzling details on the center of the flowers, and what girlie card would be complete without some pearls!

    I just love this set Field of Flowers and I am so glad it isn't retiring! I won't go thru the whole technique part for you since Frenchie did such a good job. I followed her tutorial to the tee! For the inside I added a piece of DSP and Old Olive satin ribbon (more pouting because all satin ribbon is retiring :(


    Hope you enjoyed the project today. Life is way too crazy here because we are in the process of moving so not sure when I will be able to post next but hang in there with me! I promise to post some of the new goodies as soon as I can. Thanks for stopping by.

    Monday, May 7, 2012

    Mother of Pearl

    Hello everyone! Happy Monday to all. I am so excited I can hardly stand it!!! The new Idea Book & Catalog was posted online this morning, in it's entirety!! I know that I am not allowed to share much with all of you but all I can say is: love, love, love, love...... I can not wait until June 1st so I can order some new toys! I already have my wish list ready (and wow it is not short!). I have my pre-order order coming in hopefully by next week and will be able to post some sneak peek projects for you then. Until next week I will posting some of the cards we did at March's workshop. Today we have my favorite of the group. I used the faux Mother of Pearl technique. See what you think! Would make a great Mother's Day card yes?


    I just love this color combo don't you? And of course the cherry blossom stamp from the Easter Blossoms set is one of my favorite stamps of all time! Cardstock I used was Pool Party, Calypso Coral, Whisper White and Glossy White. I used Pool Party and Staz On brown ink pads for the stamping and Calypso Coral marker for the coloring.


    Here is a close up (best I could do ;) of the Mother of Pearl technique. Such a fun (but a little messy) technique. After stamping your image with Staz On (because it is permanent and won't smear) and then coloring it in, use a crumpled up piece of plastic wrap and dab it into some Frost White Shimmer Paint (I used a paper plate and poured a little paint out at a time). Dab off any excess paint so you don't get a great big blob and then dab randomly onto the Glossy White cardstock. Then let dry. Gorgeous!!!


    Tools I used are as follows: extra large oval punch, ovals die for Big Shot, Adorning Accents edgelit and emboss folder, polka dot emboss folder, and small flower punch (retired) for flower on the inside. Remember not to forget the inside!! A little ribbon (don't you just love that ruffled ribbon!!), a pearl and vwualla! Hope you enjoyed the pics today. Have a great Monday!

    Tuesday, May 1, 2012

    Safari Anyone?

    Hello everyone. Happy Tuesday to ya! I had so much fun making this card today. The idea has been in my head since I saw the Mojo Monday #227 sketch and I finally got to sit down and put it into paper. I hope you like it.

     I used Cajun Craze, Crumb Cake, and Naturals Ivory cardstock. I just love the Naturals Ivory for anything "naturey" (is that a word?). I used Espresso ink for the stamped images and Cajun Craze and Crumb Cake with my blender pen for coloring in the giraffe. The texture on the background piece is a non - Stampin' Up (or "contraband" if you are using Lynnette lingo) emboss folder.


    For embellishments I used a Crumb Cake button out of the Deck the Halls designer button pack (currently on the Clearance Rack @ Stampinup.com) and then tied a little linen thread thru the holes. The burlap I purchased from a major retail craft store. Oh, and ladies don't forget the insides of your cards!! I just love how it is almost like getting a second card when you open the card up and the inside is as pretty as the outside!


    Hot off the presses! We demonstrators got a sneak peek of a few things that will be in the new 2012 - 2013 Idea Book and Catalog today. I think you are gonna love it!! We aren't allowed to show you any pictures or flyers but we can create projects with some of the new goodies and post pics of those! Soooo, as soon as I get my order in and get to creating you will all be the first to know!! Hope you have a great day!

    Friday, April 27, 2012

    Summer Smooches & Mojo Monday

    I am so excited! It's my first pic of a card! Wahoo! I know that I am behind but, for these samples today I used the Mojo Monday #231 sketch and Julee Tilman's sample as inspiration.


    Don't you just love how bright and cheery it is?  I used the Summer Smooches DSP (designer series paper) and fabric brads (big sad face that Stampin' Up has already ran out of the brads), but you still have a few more days left to get your hands on some of this gorgeous paper! (the "preview" ends Monday, April 30 th) If you miss it this time it will also be in our new big catalog that comes out on June 1st.
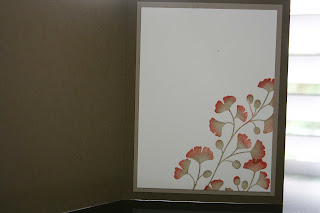


    I used the five petal flower punch (retiring list) and the 1 1/4" square punch (punched with the corner in the center to make the points on textured piece). From the Big Shot I used the large flower from the Blossom Party die, the large scallop from Scallop Circle #2 (retiring list), the 3# Circle die (layers perfectly with the Scallop Circle), and for some texture the Houndstooth emboss folder.

                                                                                     
     As for cardstock, I used most of the colors that are in the DSP (don't you just love the color codes that are in the catalogs with each DSP!! Invaluable tool yes?) - rich razzleberry, tangerine tango, daffodil delight, real red, and lucky limeade. For accessories I chose the latest addition to the seam binding family (daffodil delight) and some pearls for bling. What I love about this card is you could use any sentiment you wanted (and that fit of course, always a challenge!). I chose birthday but this could easily make a thank you or hello friend.

    Sure hope you enjoyed the projects today, I know I sure enjoyed making them! Thanks for stopping by.

    New Ink Pad & Refill Clarification

    Ok, I finally searched around long enough and found some more info on the new ink pads and reinkers. I know that the 5 colors that they reformulated were having a lot of problems with staying true to color so this makes sense to me. I hope this helps those of you who are weeding thru those huge retiring lists.


    There are only 5 colors that are being reformulated.  So for example you can use Daffodil Delight reinkers on both style pads since the ink is not being reformulated.  It's only the 5 reformulated reinkers that you must use on new pads only.  All other colors remain the same.
    Please note: Five ink colors have undergone formula changes to improve functionality and color stability with the new firm foam pads. These colors are
    • Basic Black
    • Basic Gray
    • Marina Mist
    • Perfect Plum
    • Tempting Turquoise


    Happy Friday to all!

    Thursday, April 26, 2012

    2012 Retiring Lists

    It's that time of year again! The retired lists have arrived. I know they look really scary at first glance but since Stampin' Up is changing the catalog strategy this year (smaller Idea Book and Catalog once a year coming out on June 1st and bigger Mini Catalogs twice a year), they had to get rid of more products than in past years. The classic stamp pads are not going away, we are just getting new and improved firmer foam pads that will give a much cleaner image when stamped. A few important things to remember:


    1. the 2010-2012 In Colors will be retiring as of May 31st, so if you can't live without some of those colors make sure to stock up on paper, ink refills, and accessories.
    2.  you don't have to worry about Stampin' Up running out of those stamp sets that are retiring,  but if you see some favorites on the accessories list they are "while supplies last"
    3. the textured cardstock is retiring (sniff, sniff) so if it was a favorite of yours like it was mine, stock up!
    4. ALL of the craft ink and pads are retiring (stomping my feet and pouting) so if you own them you might think about ordering an extra set of the reinkers so you won't run out.
    5.  the Stampin' Write Markers aren't going away but they are reconfiguring them so only certain colors are going to be available for purchase singly. If you have the time to go thru your markers and pick the few that are pretty wasted (I already have my list!) you might consider buying them before they are only available for order within the color families.
    6. the Occasions Mini Catalog expires on April 30 so make sure you have ordered everything you need from it before it is gone, gone, gone!  


    If you have any questions regarding the retiring lists (or about anything for that matter ;) just shoot me an email. I would love to hear from you! Happy Shopping!

    Just kinda getting my feet wet in the blog-o-sphere but don't worry, I will be posting pics of some projects very soon! Thanks for stopping by!

    Hello World!

    Hello everyone. I have finally taken a leap of faith and started a stamping blog! Being that I am not that savvy with all of this computer stuff, faith is definitely a requirement for me! Anyhoo, if you don't already know me, I am a Stampin' Up demonstrator and have been for several years. I always say that stamping is my sanity, especially in this crazy world of work, 3 kids, 1 husband (thank goodness, love you honey ;)-, household chores, etc. I am an avid blogger (afraid to count how many blogs I have bookmarked!) and I absolutely love, love, love to find inspiration from all of the super talented people out there. I want to say up front a HUGE thank you to all of you who have inspired me over the years. So here I go! Please be gentle.....